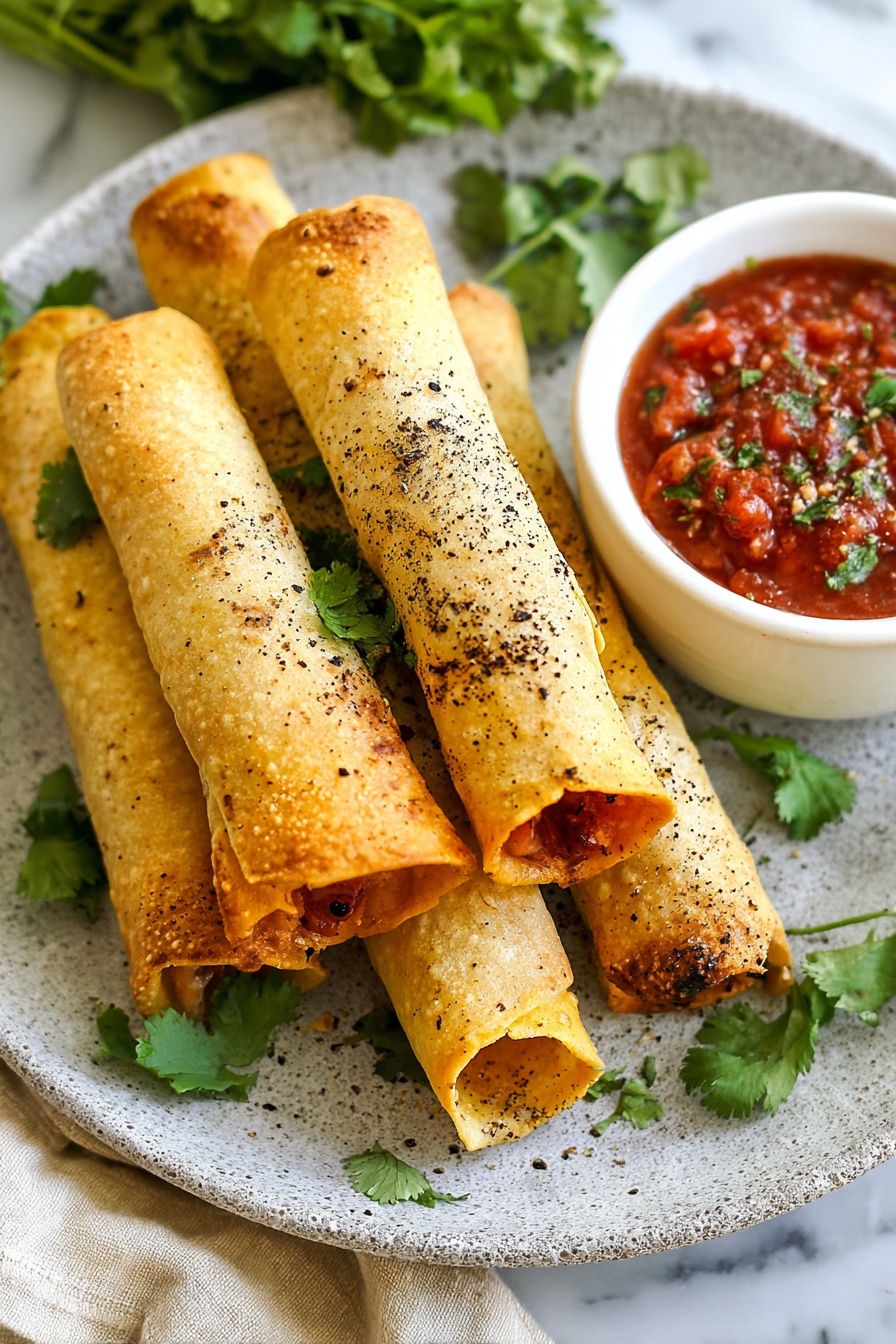
There’s something irresistibly satisfying about crispy little rolled tortillas packed with savory, cheesy chicken—this Baked Chicken Taquitos with Cheesy Filling Recipe nails that balance perfectly. Whether you bake, pan-fry, or air-fry them, these taquitos are a fun, flavorful way to enjoy a homemade Mexican-inspired snack or meal.
Jump to:
Why You'll Love This Recipe
This Baked Chicken Taquitos with Cheesy Filling Recipe has quickly become a go-to for casual weeknight dinners or game-day snacks in my house. They’re a crowd-pleaser that also lets you feel good about what’s going on your plate.
- Crunchy outside, creamy inside: The contrast between the crispy tortilla exterior and the melty, cheesy chicken filling is pure bliss.
- Simple ingredients, big flavor: You don’t need a long list—easy pantry staples come together for something unexpectedly delicious.
- Versatile cooking methods: Whether you bake, pan-fry, or air-fry, you get amazing results, so you can adapt based on your kitchen set-up.
- Kid-friendly and customizable: Everyone loves these taquitos, and it's easy to tweak fillings and toppings to suit your tastes.
Ingredients & Why They Work
The magic here is all in how these simple ingredients combine to create a filling that’s flavorful, moist, and cheesy without being heavy. Plus, the spices make that chicken pop with warmth and just a little kick.
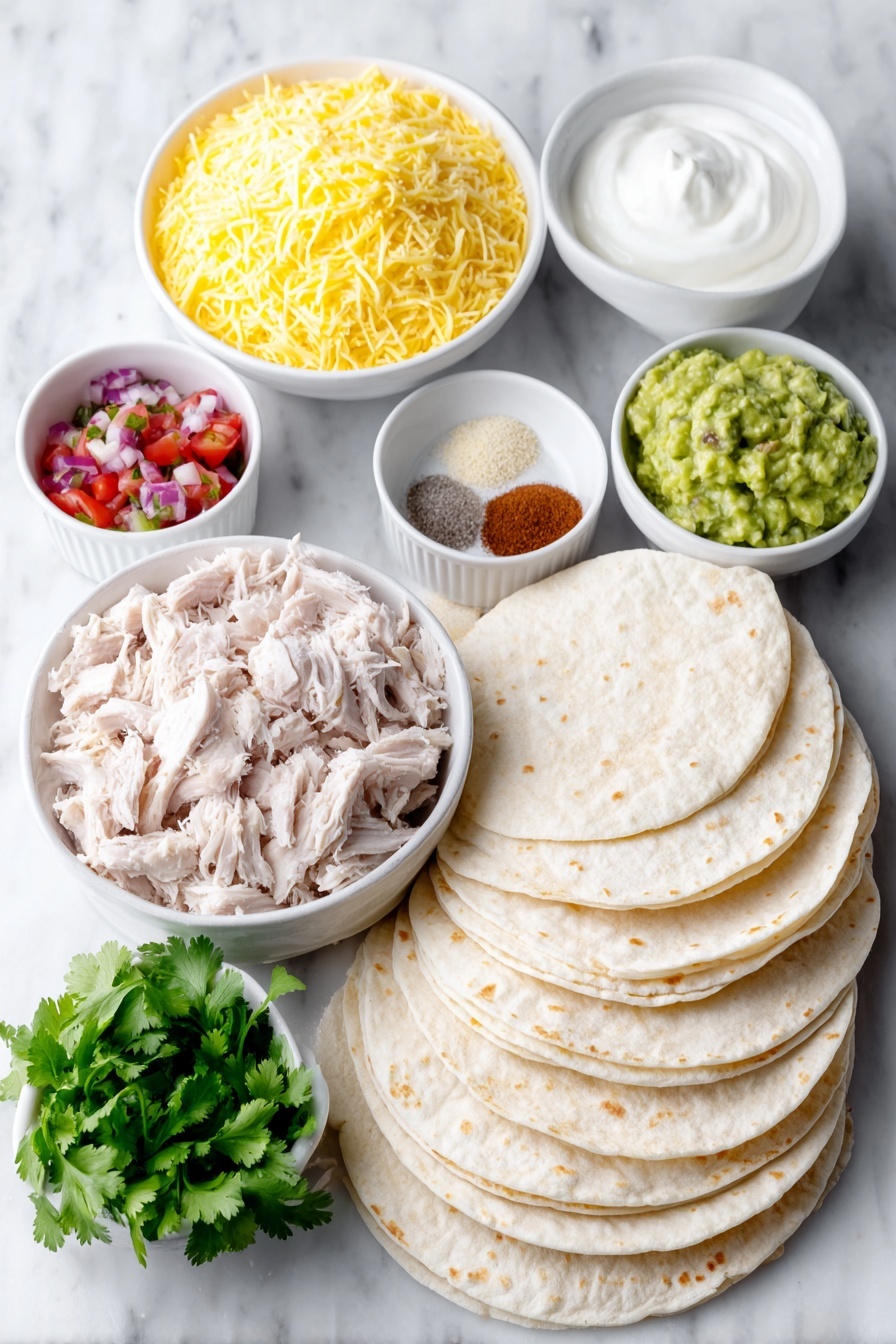
- Cooked shredded chicken breast: The lean protein base that soaks up spices and keeps the filling hearty.
- Salsa (chunky style recommended): Adds moisture and a tasty tangy zip that brightens every bite.
- Plain nonfat Greek yogurt: Swaps in some creaminess and tang, plus a touch of healthy protein.
- Chili powder, garlic powder, ground cumin, kosher salt: These spices bring big flavor without needing anything fancy.
- Freshly shredded Monterey Jack, cheddar, or Mexican blend cheese: Melts perfectly and pairs beautifully with the seasoned chicken.
- 6-inch flour or corn tortillas: Flour are soft, corn have a bit more earthy flavor—both work, just warm the corn ones first to prevent cracking.
- Olive oil spray or cooking spray: Helps the tortillas crisp up beautifully when baking or air frying.
- Optional toppings (Greek yogurt, sour cream, cilantro, guacamole, diced tomatoes): Finishing touches that add freshness and a creamy cool counterpoint to the spicy taquitos.
Make It Your Way
One of the joys of this Baked Chicken Taquitos with Cheesy Filling Recipe is how flexible it is. I often switch up the kind of cheese or salsa depending on what’s in the fridge, and my family has even requested adding some black beans or corn to the filling for extra texture.
- Variation: I sometimes swap in cooked shredded turkey or even leftover rotisserie chicken—it all works beautifully with the spices and cheese blend.
- Dietary swap: To make it dairy-free, try vegan cheese and swap Greek yogurt for a creamy avocado blend.
- Seasonal twist: Adding fresh diced jalapeños or a splash of lime juice brightens these taquitos up in warmer months.
Step-by-Step: How I Make Baked Chicken Taquitos with Cheesy Filling Recipe
Step 1: Mix the zesty filling
Start by combining your shredded chicken with salsa, Greek yogurt, and all the spices. I like to mix these in a medium bowl so every bite has a bit of everything. Then folding in shredded cheese finally brings the filling together — creamy, cheesy, with that perfect savory kick. Take a moment to taste the mixture—you might want to adjust salt or spice before rolling.
Step 2: Warm those tortillas (especially corn!)
One key I found is that warming your corn tortillas gently in a dry skillet makes them pliable and less likely to crack when rolled. Flour tortillas tend to be soft already, so I usually skip warming them. This small step saves a lot of frustration when wrapping your taquitos tight.
Step 3: Roll ‘em tight and secure
Place about one-sixth of the chicken mixture near the center of each tortilla. Roll it up as snug as you can, making sure the seam is underneath when you place them on a parchment-lined baking sheet. If you notice the filling trying to escape, a toothpick can help hold things together during baking (just remember to remove them before eating!).
Step 4: Crisp and bake to perfection
I preheat my oven to 425°F, mist the taquitos lightly with cooking spray, and bake them for about 18 minutes. You want a light golden color all over and super crispy edges. It’s this crispiness that totally nails the taquito experience—crispy shell, gooey inside!
Top Tip
From my experience, the best baked taquitos come down to tortilla prep and baking technique. Here’s what I’ve learned by trial and error over the years:
- Warm your corn tortillas: Never skip this step or you’ll end up with cracked shells and escapee filling.
- Use cooking spray generously: A light mist on top helps achieve that golden crisp without excess oil.
- Don’t overcrowd the baking sheet: Give your taquitos room to crisp evenly; crowding cools the pan and gives less crunch.
- Check the edges for doneness: The absolute best indicator that they’re ready is golden, crispy edges—not just color on top.
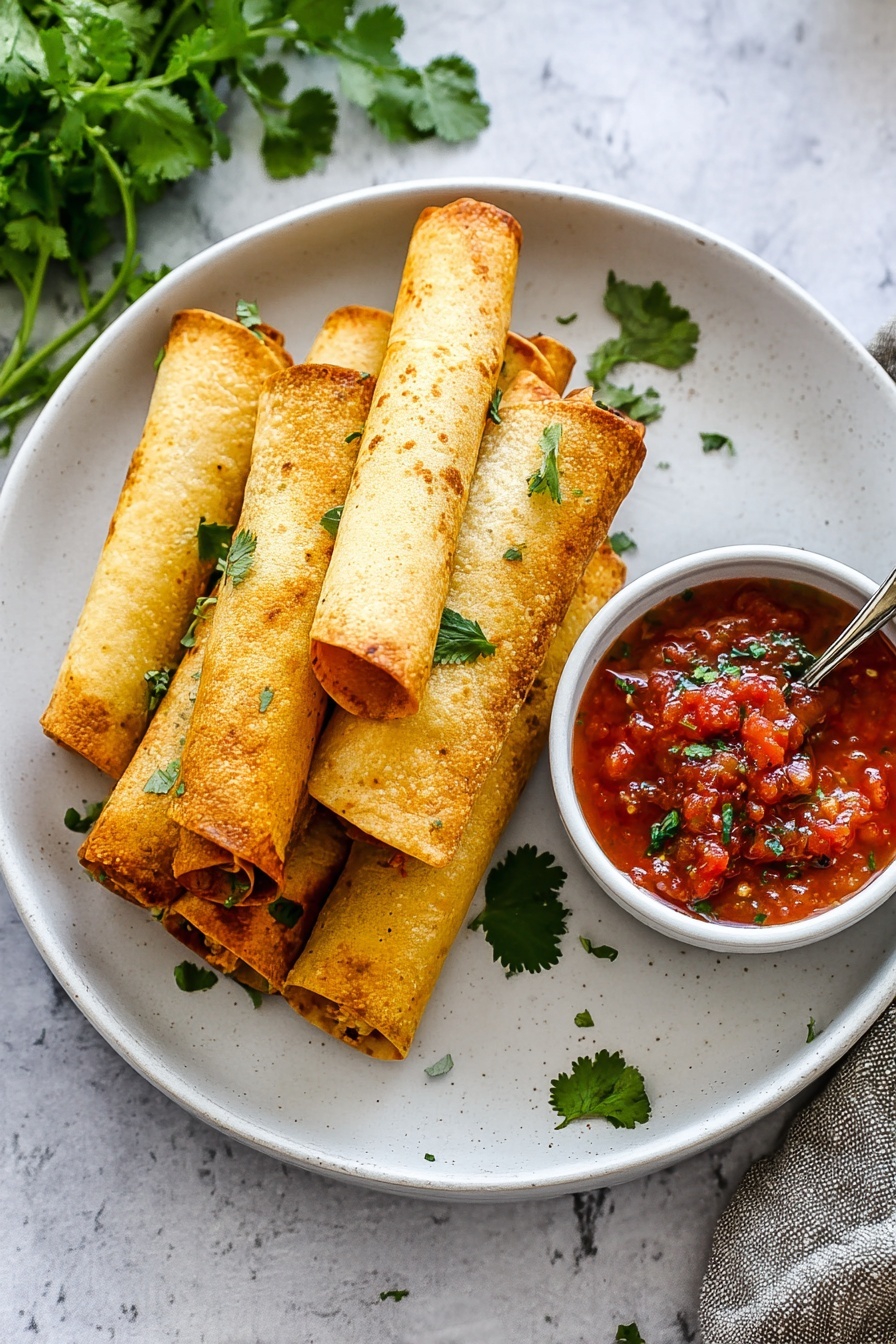
How to Serve Baked Chicken Taquitos with Cheesy Filling Recipe
Garnishes
My go-to garnishes are a drizzle of Greek yogurt thinned slightly with milk—it adds just enough tang and creaminess—and lots of freshly chopped cilantro. I also love topping with dollops of guacamole and some diced tomatoes or extra salsa for a fresh pop of color and flavor.
Side Dishes
I often serve these taquitos alongside a simple Mexican street corn salad or a fresh, crunchy cabbage slaw to balance the richness. A side of black beans or a colorful quinoa salad works beautifully for a well-rounded meal, too.
Creative Ways to Present
For parties or game days, I’ve laid these out on a big platter garnished with lime wedges and trailing swirls of salsa and guacamole—you could even serve them upright in a tall glass for an eye-catching appetizer display. It’s fun and makes guests feel like they’re grabbing flavored popsicles of deliciousness!
Make Ahead and Storage
Storing Leftovers
I like to let leftover taquitos cool completely, then tightly wrap them in foil or store them in an airtight container in the fridge. They keep well for 3–4 days, making them a great next-day snack or quick lunch.
Freezing
Freezing is a great option if you want to meal prep. Simply roll and place the uncooked taquitos on a baking sheet lined with parchment, freeze until firm, then transfer to a freezer bag. When ready, bake straight from the freezer—add a few extra minutes to the bake time, and you’ll have crispy taquitos in no time!
Reheating
To reheat, I prefer popping leftover taquitos in a toaster oven or regular oven at 375°F for about 8–10 minutes so they regain their crispness. The microwave tends to make them soggy, so it’s a method I avoid if possible.
Frequently Asked Questions:
Absolutely! Corn tortillas work great but make sure to warm them first so they’re pliable and won’t crack during rolling. Warm them in a skillet for 15–30 seconds per side until soft before assembling.
Warming the tortillas to prevent cracking and lightly spraying them with oil before baking makes all the difference. Also, avoid crowding the baking sheet to allow hot air to circulate for even crisping. Baking at 425°F helps achieve that perfect crunch.
Yes! You can assemble your taquitos in advance and refrigerate them. For even better prep, you can freeze them before baking, then bake directly from frozen when you’re ready. Just add a few extra minutes to the baking time.
I love serving them with fresh garnishes like avocado or guacamole, a squeeze of lime, and a side of salsa or pico de gallo. Pair with a simple salad, Mexican street corn salad, or black beans for a complete meal.
Final Thoughts
I really can’t recommend this Baked Chicken Taquitos with Cheesy Filling Recipe enough—it’s one of those recipes that’s simple, satisfying, and always gets rave reviews. Whether you’re feeding the family or need a tasty appetizer for friends, these taquitos hit the spot every time. Give it a try, and I’m confident you’ll end up making them again and again, just like I have!
Print
Baked Chicken Taquitos with Cheesy Filling Recipe
- Prep Time: 10 minutes
- Cook Time: 18 minutes
- Total Time: 28 minutes
- Yield: 6 taquitos
- Category: Appetizer
- Method: Baking
- Cuisine: Mexican
- Diet: Low Lactose
Description
These Chicken Taquitos are crispy on the outside and creamy and cheesy on the inside. Made with shredded chicken, cheese, and a flavorful blend of spices, they can be baked, pan-fried, or air-fried to perfection and served with your favorite toppings like sour cream, guacamole, or salsa.
Ingredients
Filling
- 2 cups cooked, shredded chicken breast
- ⅓ cup chunky salsa
- ⅓ cup plain nonfat Greek yogurt
- 1 teaspoon chili powder
- ½ teaspoon garlic powder
- ½ teaspoon ground cumin
- ½ teaspoon kosher salt
- 1 cup freshly shredded Monterey Jack, cheddar, or Mexican blend cheese
Assembly
- 6 6-inch flour or corn tortillas
- Olive oil spray or nonstick cooking spray or oil (for frying)
Toppings (optional)
- Greek yogurt or sour cream (thinned with a little milk for drizzling)
- Chopped fresh cilantro
- Guacamole
- Chopped diced tomatoes or additional salsa
Instructions
- Prepare the filling: In a medium bowl, combine the shredded chicken, salsa, Greek yogurt, chili powder, garlic powder, ground cumin, and kosher salt. Stir well to incorporate all the spices. Then fold in the shredded cheese evenly.
- Warm tortillas: If using corn tortillas, heat a nonstick skillet over medium heat. Warm each tortilla on both sides for 15 to 30 seconds until soft and pliable. Flour tortillas do not need warming.
- Roll the taquitos: Working with one tortilla at a time, place about one-sixth of the chicken mixture down the center. Roll the tortilla tightly and place it seam-side down on a parchment-lined baking sheet. Secure with a toothpick if needed. Repeat with remaining tortillas and filling.
- Choose cooking method:
- Bake: Preheat oven to 425°F. Lightly mist the tops of the taquitos with cooking spray. Bake for 18 minutes until golden and crispy at the edges.
- Pan-fry: Pour about 1 ½ inches of peanut or similar frying oil into a large high-sided skillet and heat over medium-high until hot and shimmering. Fry taquitos in small batches, turning to crisp all sides for a few seconds per side. Drain on paper towels.
- Air-fry: Preheat air fryer to 380°F. Place taquitos seam-side down in a single layer in the basket, mist with cooking spray, and cook for 12 minutes until crisp. Avoid overlapping, cook in batches if needed.
- Serve: Serve the taquitos hot with optional toppings like thinned Greek yogurt or sour cream, chopped cilantro, guacamole, and diced tomatoes or additional salsa.
Notes
- To make rolling easier with corn tortillas, warming them makes them pliable and less likely to crack.
- Using toothpicks can help keep taquitos closed during cooking.
- Adjust the spice level by increasing or reducing chili powder and salsa heat.
- For extra crispiness, lightly spray or brush taquitos with oil before baking or air frying.
- These taquitos can be made ahead and refrigerated or frozen before cooking; just increase cook time slightly when reheating.
Nutrition
- Serving Size: 1 taquito
- Calories: 253 kcal
- Sugar: 2 g
- Sodium: 500 mg
- Fat: 11 g
- Saturated Fat: 5 g
- Unsaturated Fat: 5 g
- Trans Fat: 0 g
- Carbohydrates: 17 g
- Fiber: 1 g
- Protein: 20 g
- Cholesterol: 52 mg


Leave a Reply